
A Natural Slate Top That’s 1.5mm Thick!
This post includes affiliate links, and if you use these links to buy something, we may earn a small commission.
I recently built a 9-foot-long storage cabinet in our hallway and wanted to use slate for the top, but it was hard to find a solid slate of that length. When I came across Slate Lite and its slate veneers in a variety of colors and thicknesses, I knew my vision could still come to life.
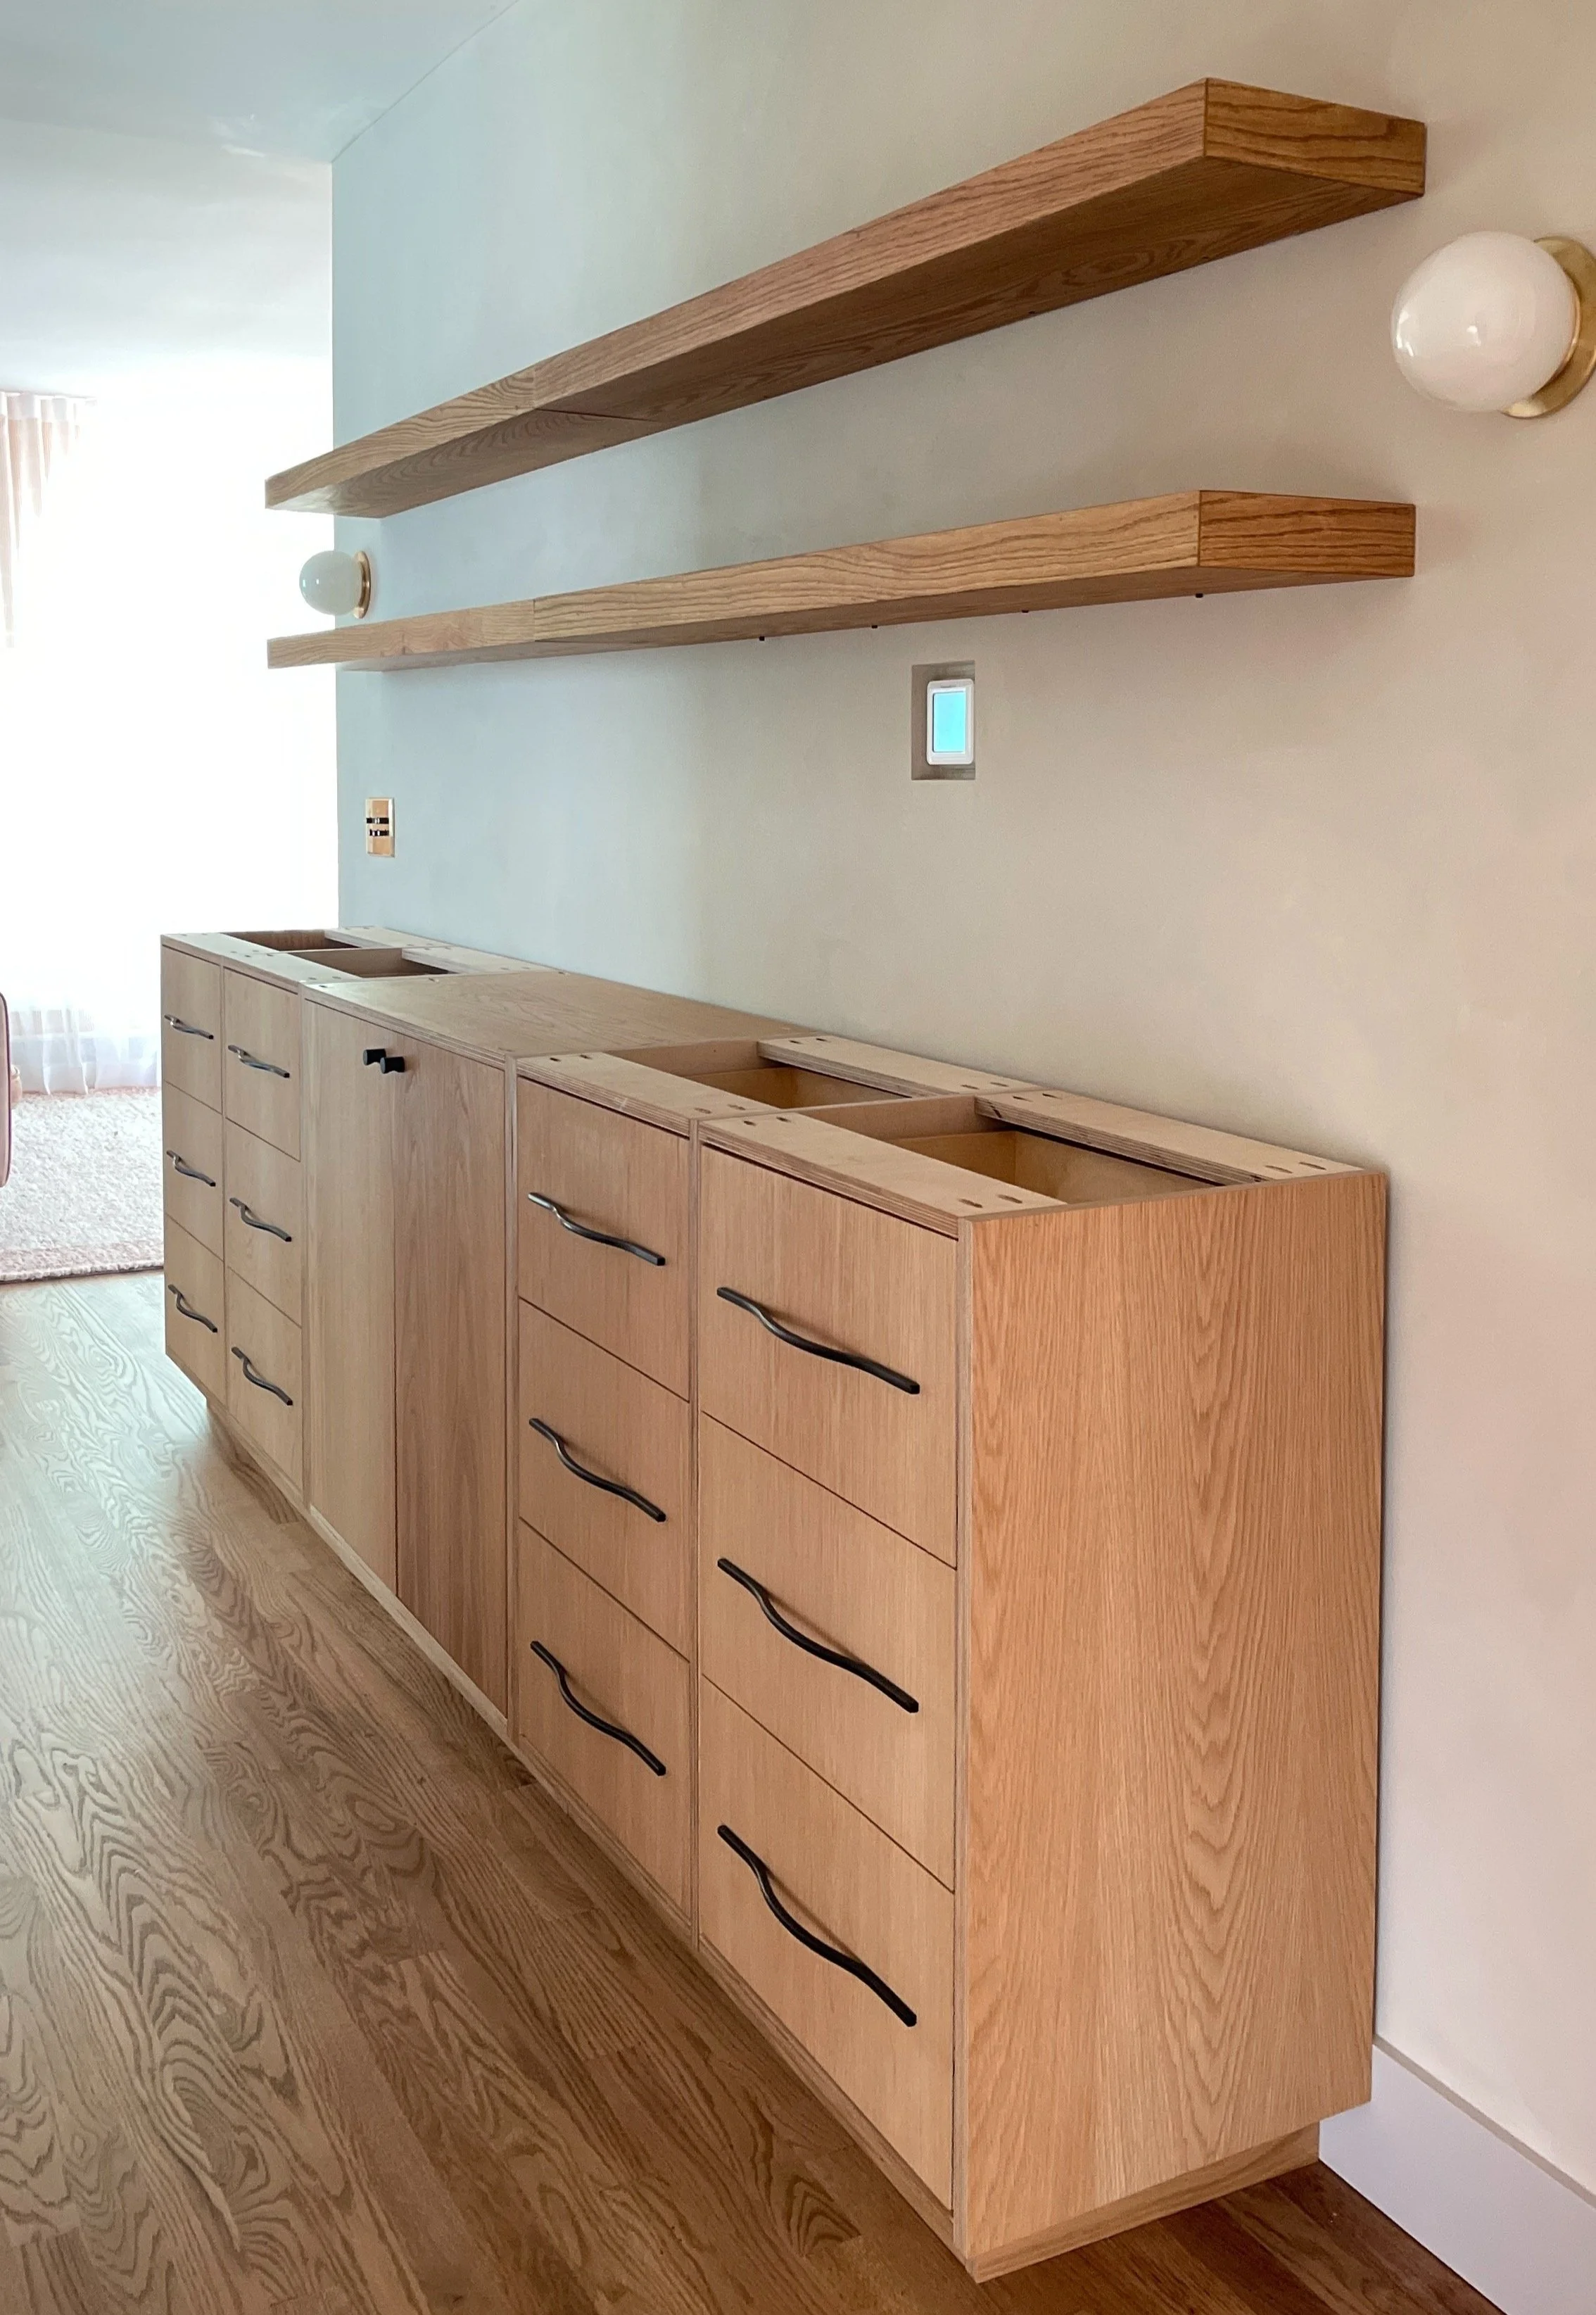
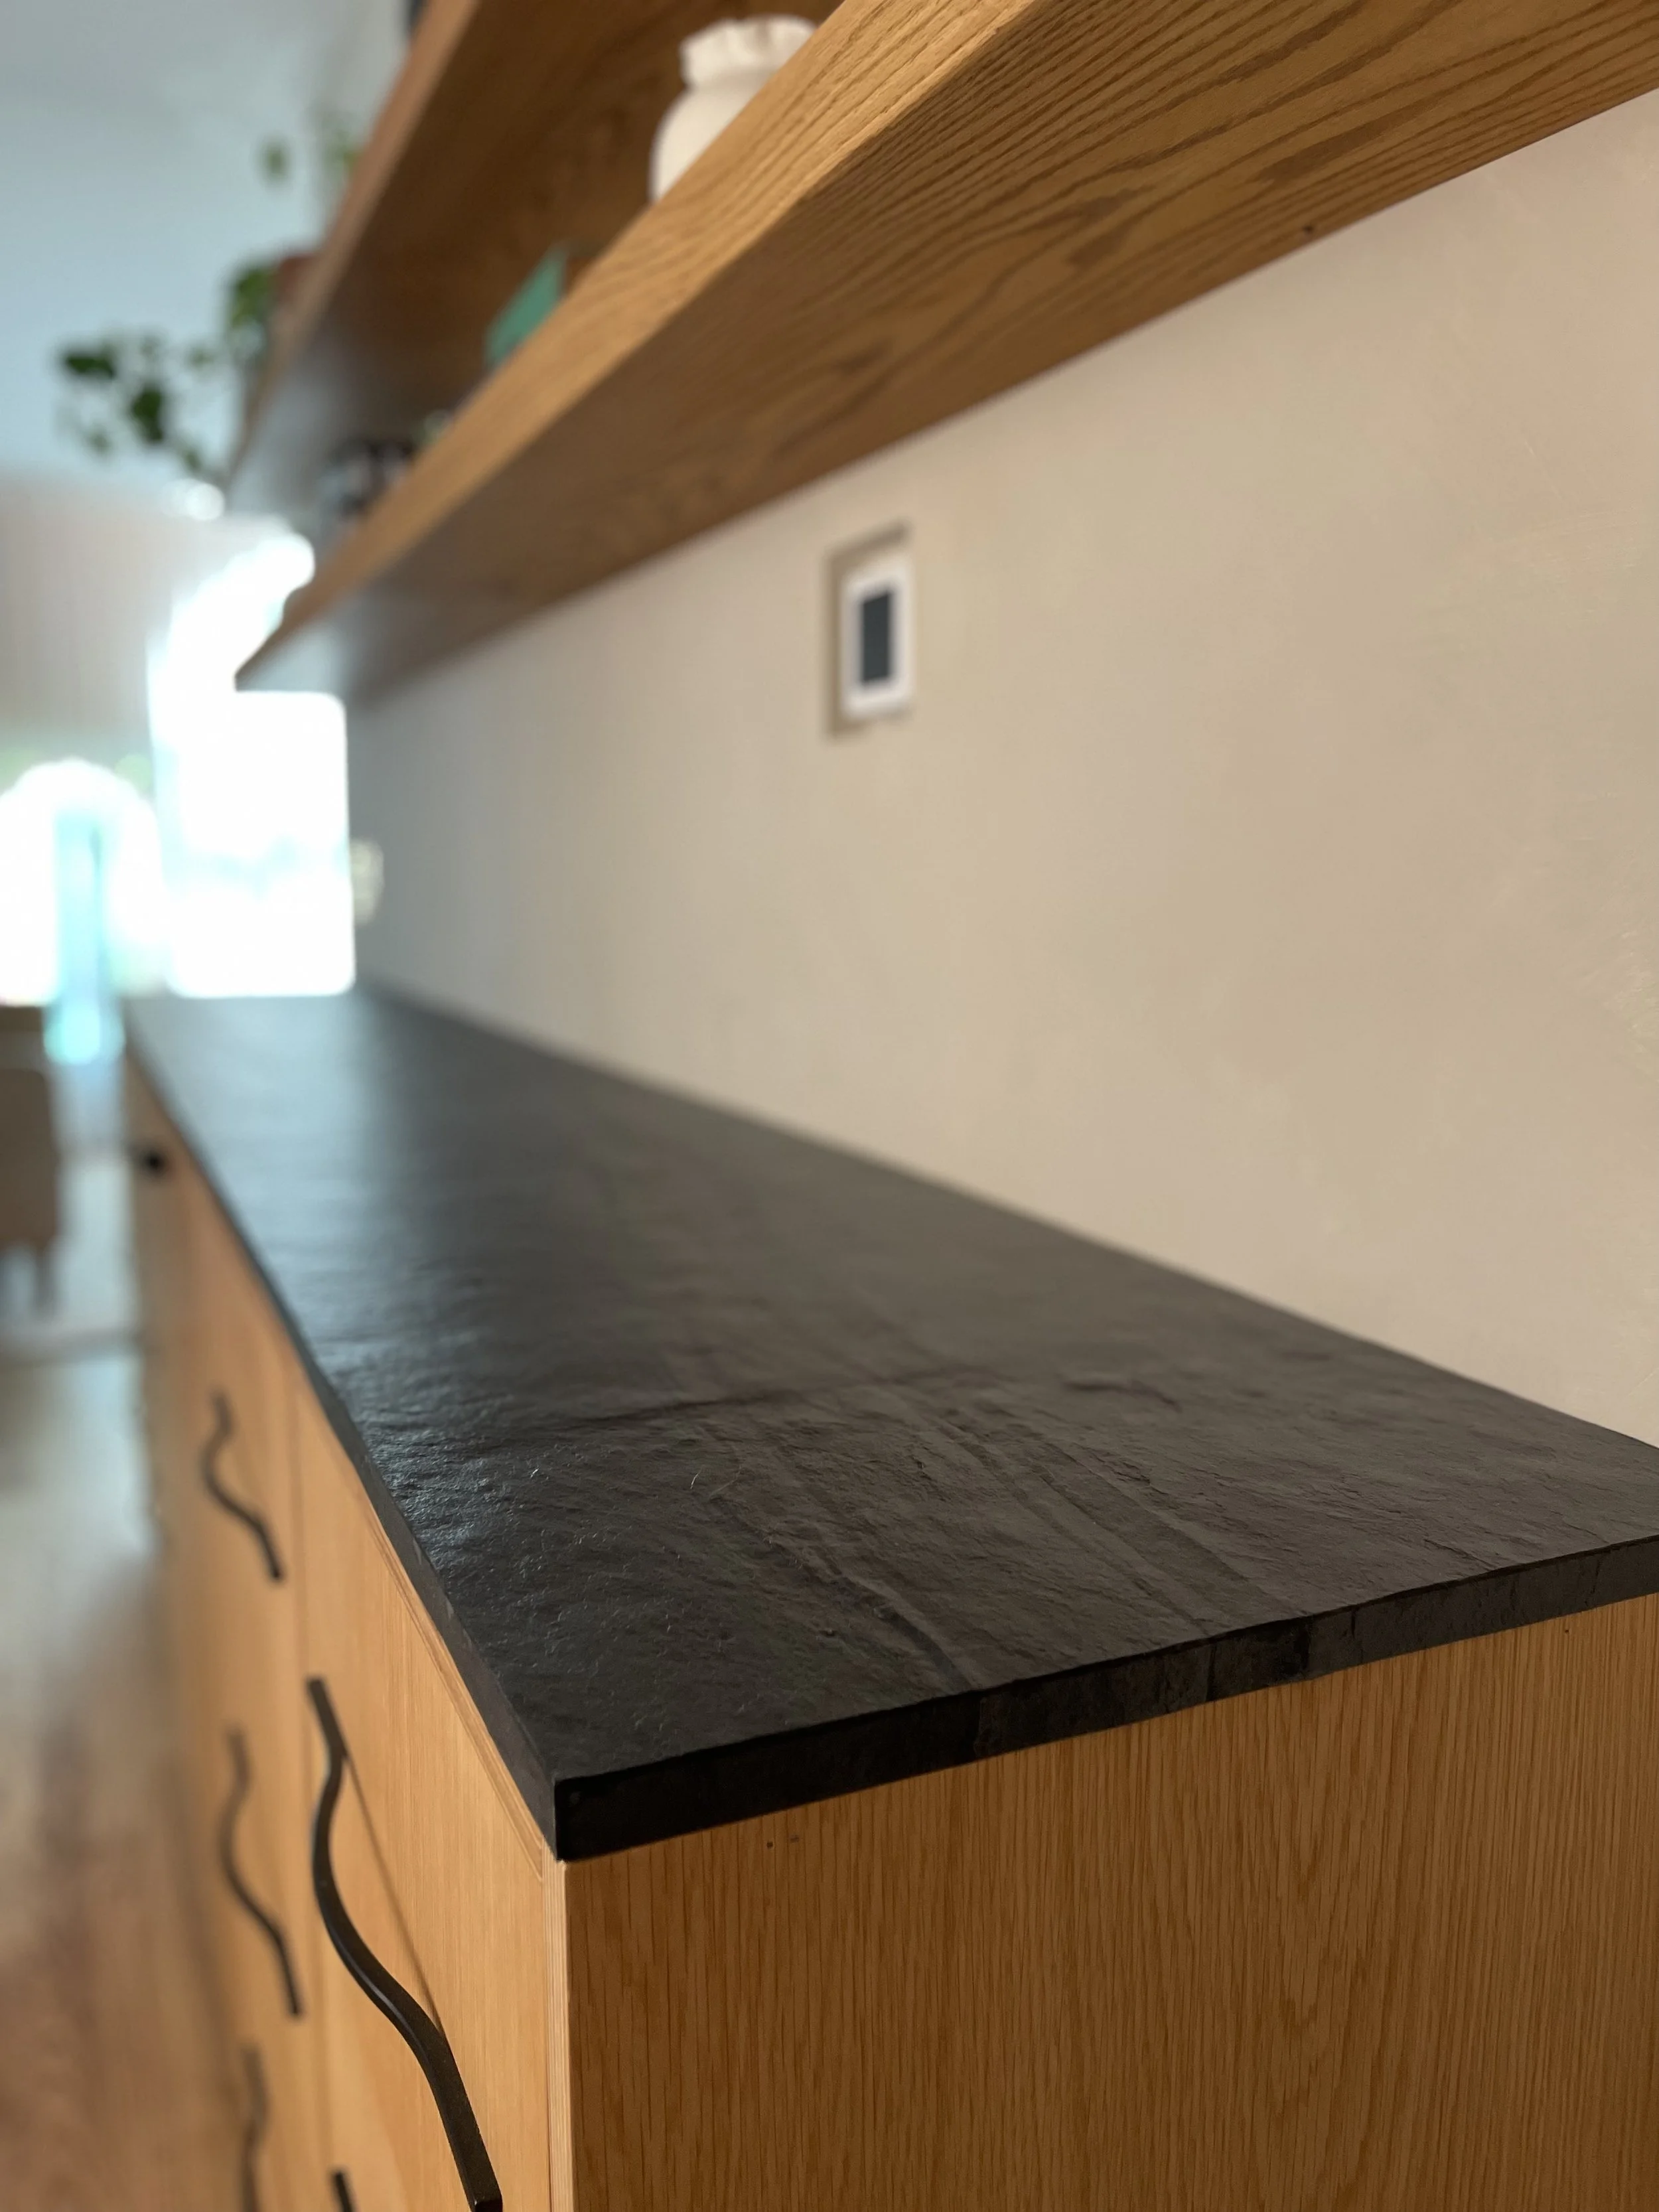
I went with their Terra Noir Vertical on our cabinet, and it exceeded my expectations. Here’s a quick, step-by-step guide on how I did it and why you might want to consider doing the same.
Why Slate-Lite?
Before diving into the installation process, let’s talk about why Slate-Lite is a fantastic choice. Slate Lite is a thin, lightweight stone veneer that offers the authentic look and feel of real stone without the heavy lifting and hefty price tag. It’s flexible, easy to cut, and can be applied to various surfaces. Plus, it’s durable and water-resistant (more on this later), making it perfect for areas like cabinet tops.
Materials Needed
Slate-Lite thin slate sheet (I used Terra Noir Vertical)
3/4” plywood top cut to size
Measuring tape
Pencil
Track saw or Stone cutter
Mineral Spirit for cleaning
Roller for smoothing and pressing
100% Acetone (a nail polish remover)
Sealant (optional)
Soft beeswax (in the same color as your slate)
Step-by-Step Installation
Measure and Cut: Start by measuring your plywood top to determine the size of the Slate-Lite sheets you'll need. Mark the measurements on the Slate-Lite sheet and lay your track saw guide on top. Carefully cut the sheet using a track saw or stone cutter. The thinness of Slate-Lite makes this part surprisingly easy.
Prepare the Surface: Using mineral spirits such as Odorless KLEAN-STRIP, ensure your plywood top is clean, dry, and free of debris. A clean, smooth surface will help the adhesive bond better with the Slate-Lite.
Apply Adhesive: Using a zigzag motion, squeeze out adhesive on the plywood top. Spread a thin, even layer of adhesive over the plywood top with a small trowel covering the entire surface. I used their Extreme Adhesive for this, and it was pretty forgiving.
Lay the Slate-Lite: Carefully position the Slate-Lite sheet over the adhesive, pressing down firmly from one end. Use a roller to press and smooth out any air bubbles to ensure a secure bond. Repeat this process, working section by section, covering the front and the sides. Let it dry overnight.
Clean Excess: After the adhesive cure time, clean all the excess edges with a router (and a flush-trim bit with a bottom bearing).
Optional Sealant: While Slate-Lite is naturally durable, applying a sealant can provide extra protection against stains and moisture. I used a coat of primer and two coats of Extreme Protection to seal the whole thing.
Seam Work: Slate-Lite's flexibility allows you to achieve tight seams that are barely noticeable. However, there were a few spots with visible lines of glue and seams, so I used soft beeswax in black to seal the seams around them. It was as simple as taping around the seam and rubbing the soft wax to cover and seal those gaps.
Final Thoughts
Installing a Slate-Lite thin slate for a cabinet top is a straightforward DIY project that added an authentic, cost-effective natural element to our hallway.
You can use code HERZSLITE to get 3 free samples and a 15% discount on your order with code HERZ15.
Have you used Slate-Lite in your home projects? Share your experiences and tips in the comments below!