
How I Assembled and Installed Our Ikea Kitchen Cabinets
This is not a sponsored post. All opinions expressed in this post are based on my personal experience. Also, this post contains affiliate links to products I’ve used and trusted. We may earn a small commission if you make a purchase through links on our site at no additional cost to you.
In the months since planning our kitchen reno, completion seemed too far from reality, but our kitchen is coming together piece by piece. It is our first Ikea kitchen, and despite all the knowledge out there, I was still nervous and didn't know what to expect. So, I'm sharing some of the key points that stuck with me and the tools I've used that made my life easier, which I hope will make yours too.
I listed all the essential tools I've used at the end of this post so that you can refer to them.
My Shopping Experience at Ikea
I planned the kitchen online using the kitchen planner tool on their site, but they also offer planning appointments where you can get in-store help and advice. Once I was happy with the layout, I went in-store to place the order. Their sales associates were super helpful with my questions, checked all components, and made critical suggestions.
The delivery process was pretty straightforward and went off with no hiccups. I had to call Ikea during my installation process twice, and anyone who answered the phone in their kitchen department answered all my questions or sent additional info via email.
While an Ikea kitchen associate is checking all the components.
Preparing Installation With Our 100+ Boxes
The first thing I did was I went through our itemized order copy and sorted the piles of our 113 boxes, arranging which order the cabinets would go in. It helped to put all components of a cabinet in one place, and this is how it's grouped in the Ikea order copy.

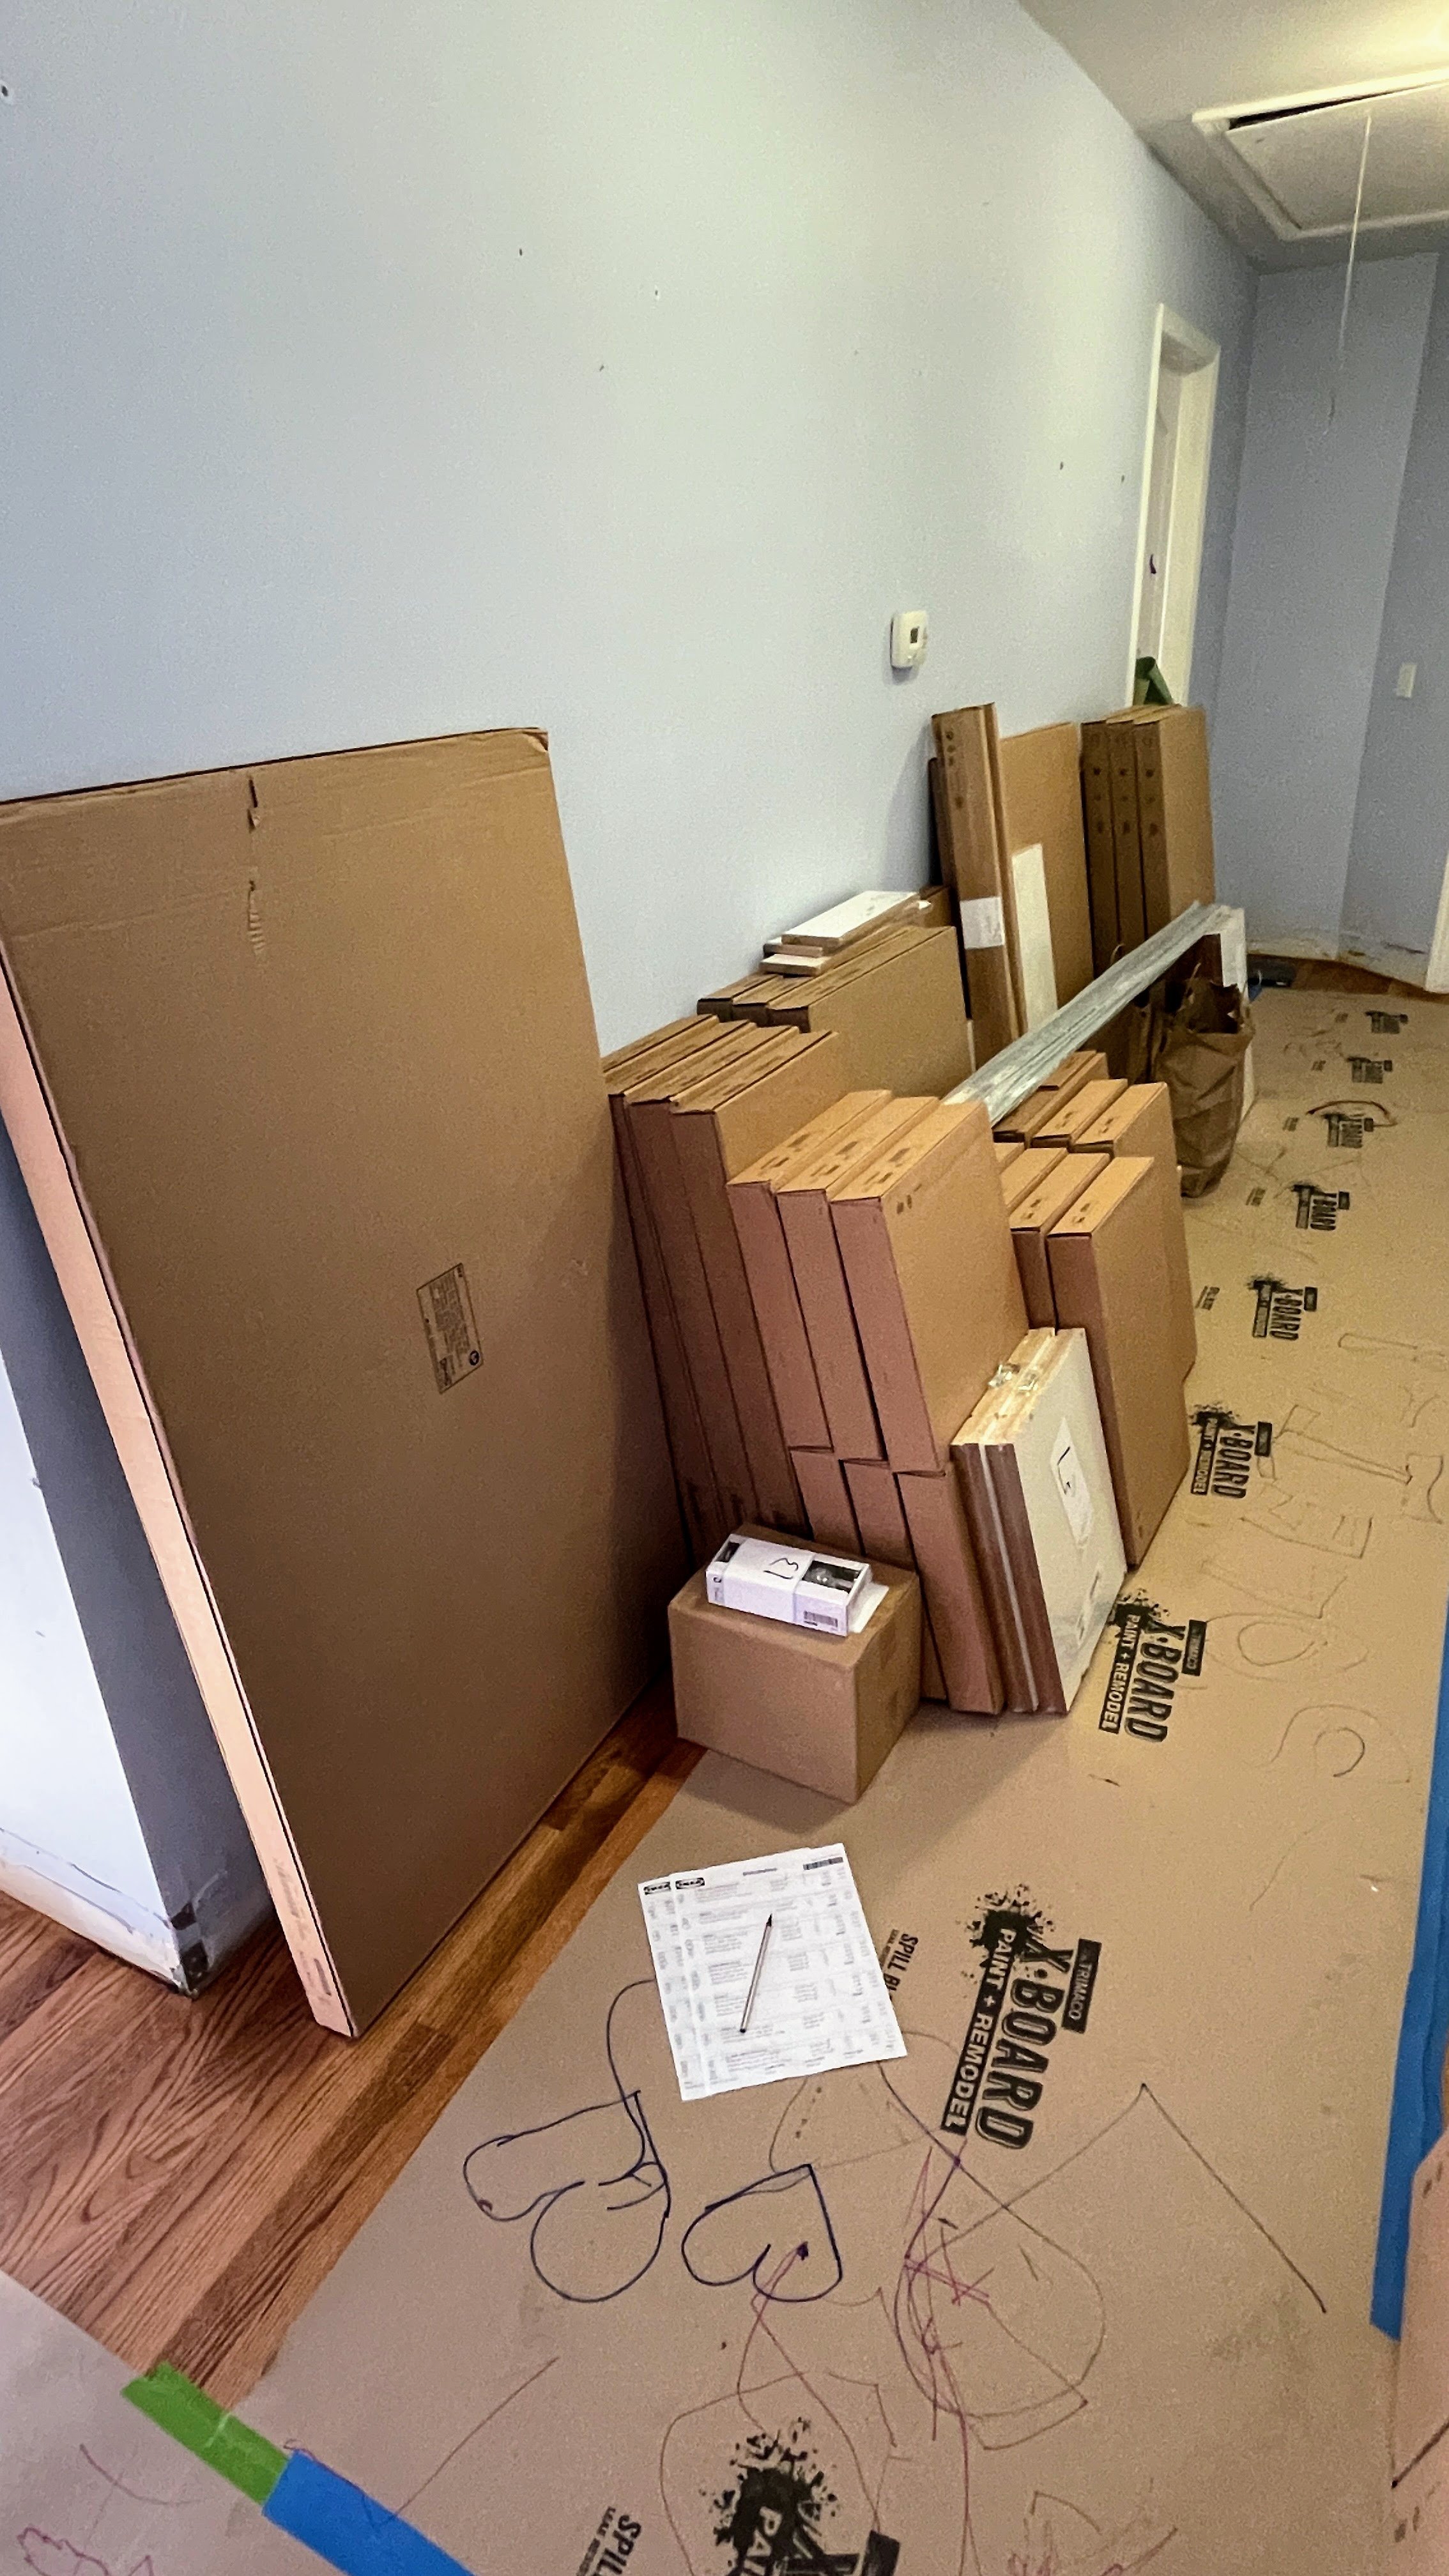

After going through all the items, I found I was missing a couple of hinges, but I had no problem getting the missing pieces from their Returns department.
Preparing the Walls & Installing Suspension Rails
This step set things up for me because I got to see where all the cabinets would go.
The Ikea order copy and the initial plan printout were essential when working with all the components throughout the installation process.
I started marking where all the cabinets would go and determining the cabinet height (not including the countertop thickness).
I drew a line across the wall using a 4' long level, started installing the suspension rails directly into the studs with #8-2 ½" cabinet screws, and did the same for all the upper cabinets.
Although you can install the cabinets right to the studs, using their suspension rails gave me the option to move the cabinets side-to-side to adjust.

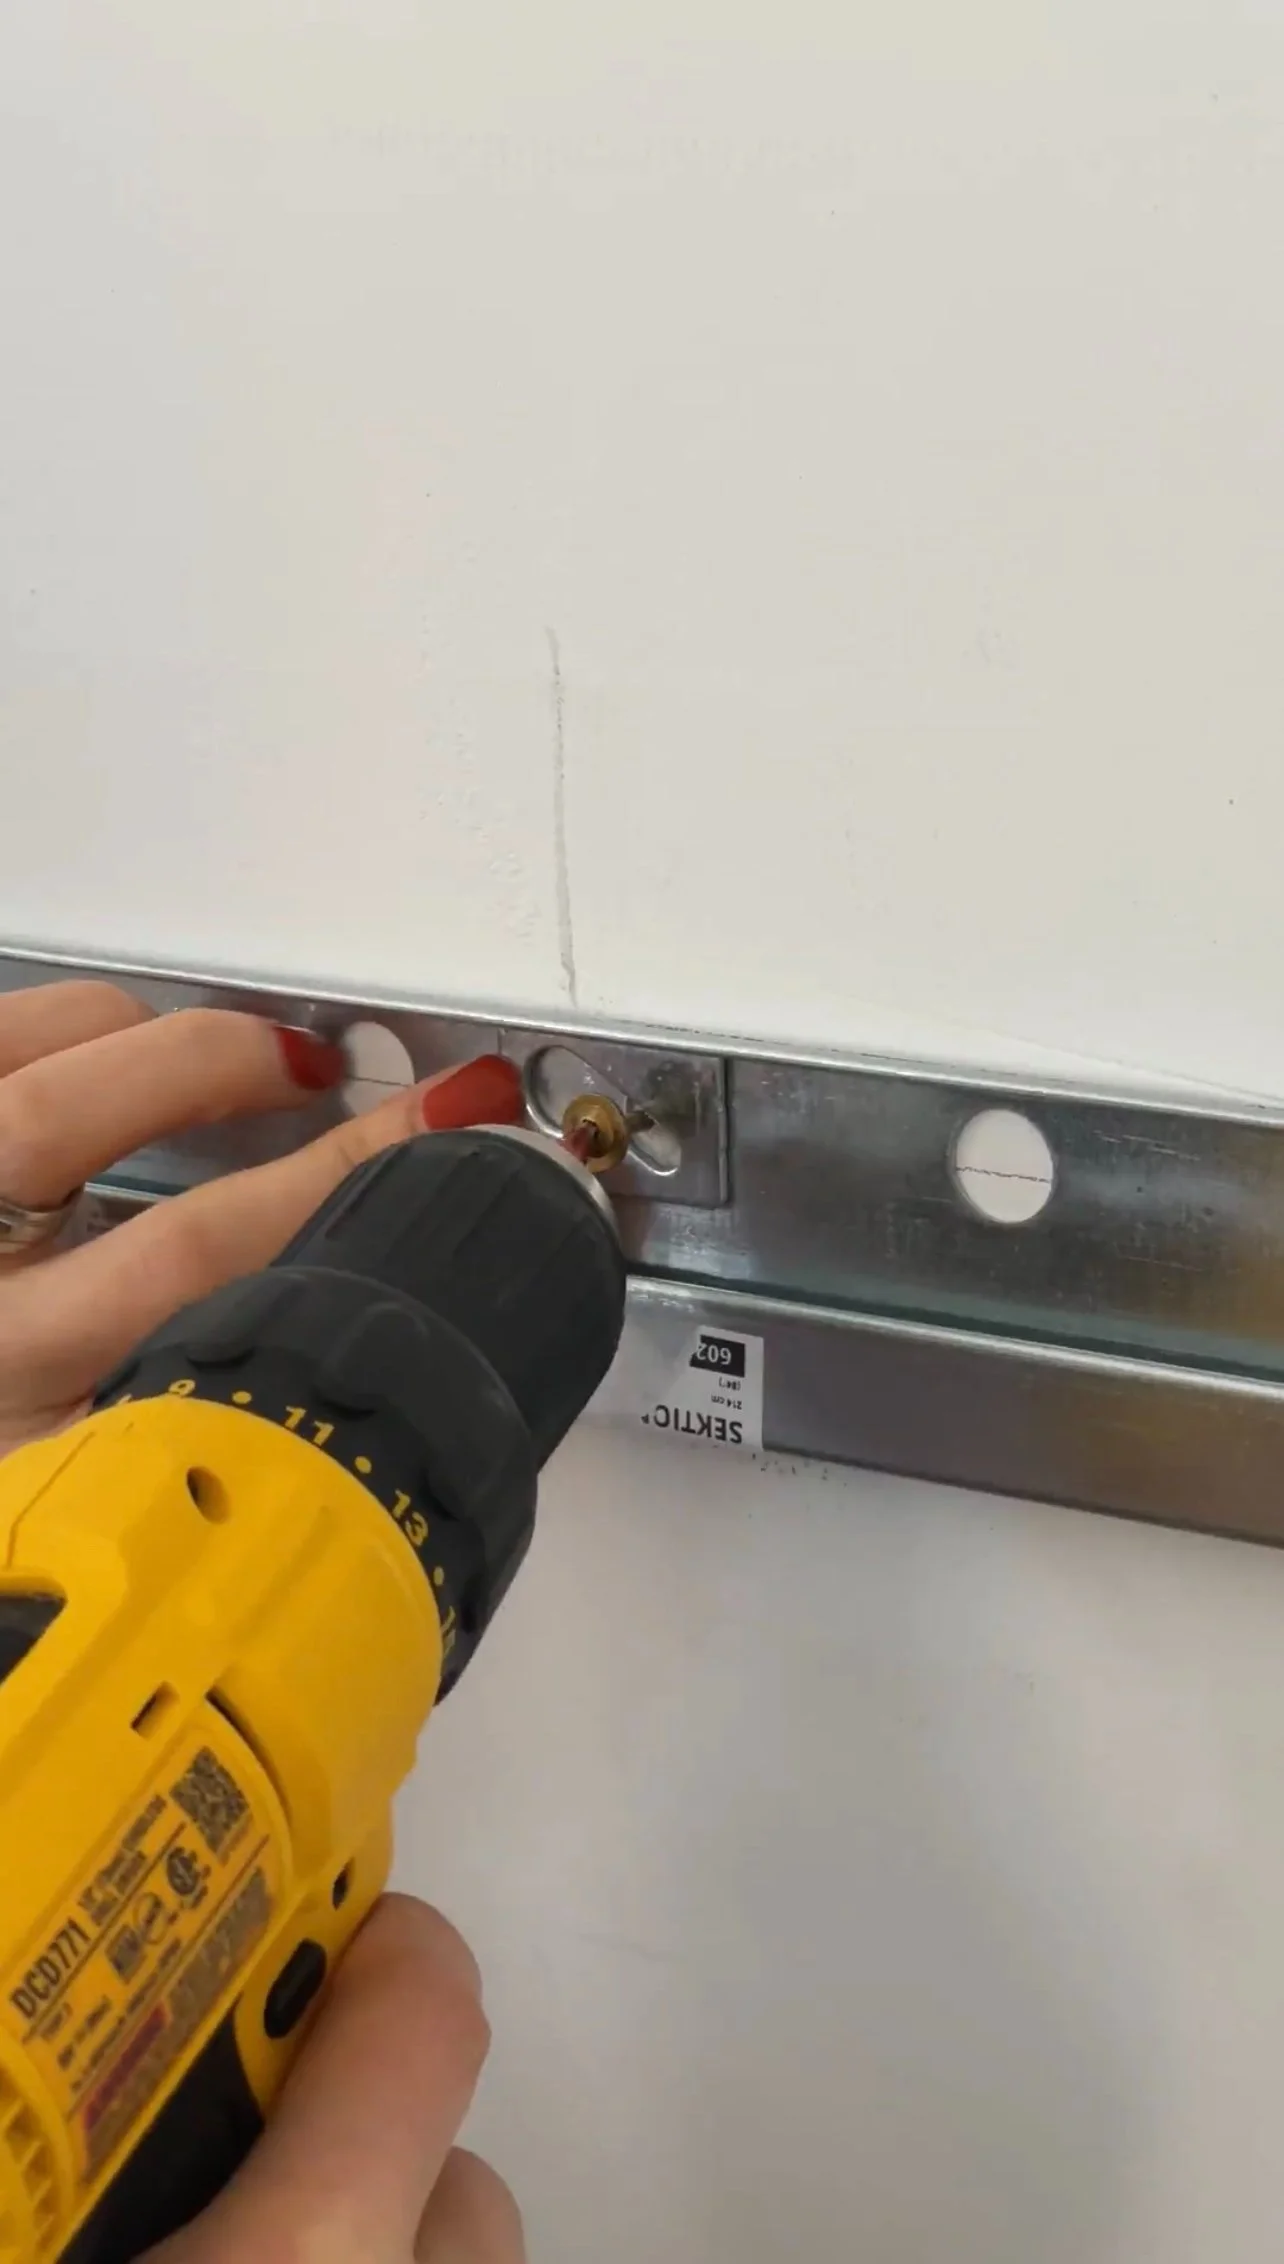
I also used the Dremel Multi-Max tool to cut the suspension rails to fit several places. A hack saw works fine, too. It just might take a bit longer.
Assembly and Installation
Once I had the suspension rails up, I assembled the cabinets as I went.
Starting with our tall cabinet from one end, I continued my way around with the base cabinets, placing our appliances along the way. I also notched a few holes to fit the plumbing and electrical wires behind the sink cabinet.

I could've started with the upper cabinets, but our priorities were to plug in our sink and dishwasher as soon as possible after living with no kitchen for a few weeks!
My battery-powered impact driver with a magnetic Phillip's head was my most used tool during the assembly. It was set to low-torque power, so it didn't overdrive my screws. The assembly process went from opening the box to following the instructions to screwing everything in place to nailing the back panels. After my second and third cabinet, I found my rhythm, and it got faster and easier.

Ikea offers two different legs that adjust from 4 1/2" to about 6". The first option is their plastic option, which adapts Ikea toe-kicks directly. I chose to go with their stainless steel Capita legs instead, which felt more sturdy, but I used these legs only on the front of the base cabinets. The rails will do the job on the back.
The next few steps were just:
Hooking the cabinets over the rails
Positioning them in their place
Fastening with their locking plastic fasteners
Sliding in the covers


Next was the island. I built a custom base for our island using 2x6 boards and then secured the whole thing using a 2" galvanized angle (I feel like this build needs its own blog post) directly to the floor. Then, I started arranging the cabinets on the base. When I was happy with all the cabinet placements, I fastened the cabinets to the base using 2" cabinet screws, then continued to the next cabinet screwing the two cabinets together with the provided Ikea screws, and repeated this until I went around the whole island.
All of our upper cabinets went up the last with the same process of assembling, hooking on the rails, positioning, and locking in place.

This was the first time I’d ever done an entire kitchen cabinet installation by myself, and though it was intimidating, it was so satisfying to bring it all to life. So if you’re starting on your own Ikea kitchen installation, I hope this helps!
If you want to see more of the process, check out my Kitchen highlights @houseofherz.
List of Tools I’ve Used
Pencil
Simple Stud finder (this is my must-have stud finder)
2 1/2” Cabinet Screws & 2" Cabinet Screws
Power Driver with Philips head (ideally magnetic)
Magnetic Philips P1 screwdriver (this was helpful when assembling the drawer fronts)
Hammer & Rubber Mallet
Trigger Clamps (to hold two cabinets in place)
Furniture moving pads for hardwood floor (these prevented me from breaking my back ☺️)
Step ladder
Happy installing!